I turned a retro rotary phone into an AI voice assistant
There is something satisfying about the heavy clunk of an old telephone handset, and I had an idea that connecting an old phone to an LLM would be really cool.
Browsing on Finn.no, I spotted a vintage Norwegian Elektrisk Bureau rotary phone. Special thanks to the kind lady who gave this phone away, now conversations can continue through it once again. A classic piece of mid-century Scandinavian engineering with a spring-loaded brass hook mechanism inside.
Not another smart speaker that listens to you 24/7. An actual landline interface: you ask a question, the phone rings, you pick up the receiver, hear the answer in the original earpiece, and when you slam the handset back on the cradle, it cuts off the call immediately emulating the landline experience.
Finding the Hook Switch
With this Elektrisk Bureau phone, taking off the bottom shell revealed a rat’s nest of colored wires leading to a multi-pole leaf switch buried deep inside a clear plastic housing, firmly riveted under the main board. Taking the PCB out meant de-soldering or breaking mechanical linkages that I might never get back together.
So I grabbed my multimeter and probed every pair of screw terminals I could find on the outside while pressing the cradle lever up and down.
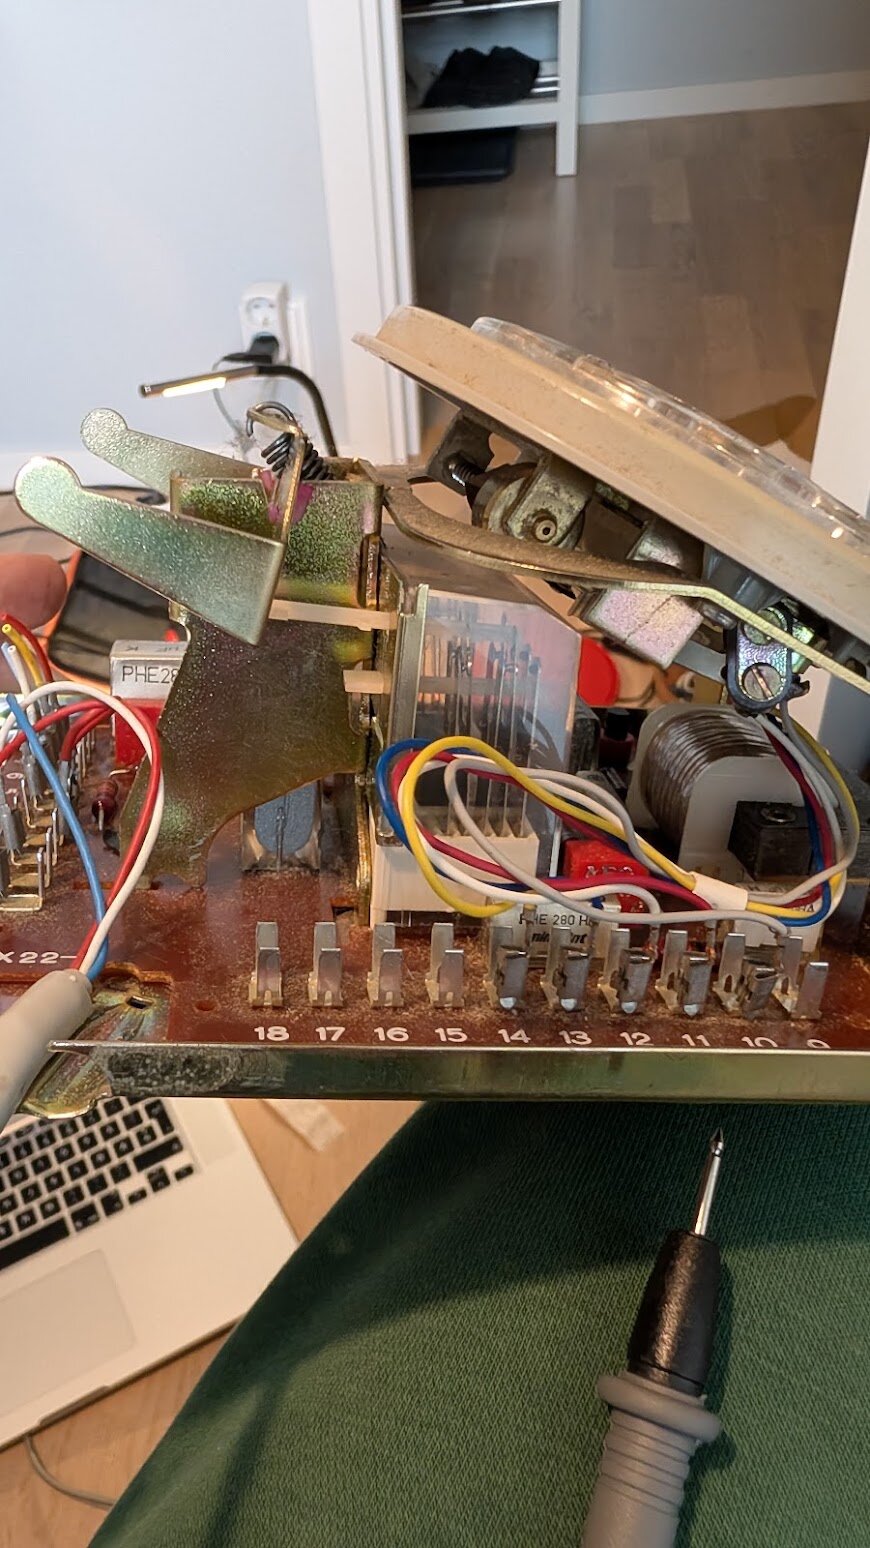
Nothing was a clean short-circuit 0Ω vs infinite Ω.
Instead, I found terminals that measured:
- 16 Ω when the handset was lifted (UP)
- 1.6 kΩ when the handset was on the cradle (DOWN)
Because the leaf switch was still tied into the phone's internal transformer and bell coils, it wasn't acting as an open switch.
Beating Digital Logic with Analog Tricks
An ESP32 digital pin expects 0V for LOW and 3.3V for HIGH. With internal pull-ups (~45kΩ), the voltage difference between 16Ω and 1.6kΩ barely moved the needle (0.01V vs 0.11V)—the ESP32 just saw a permanent LOW.
The fix? Don't treat it like a digital switch.
I built a simple external voltage divider using a 300Ω pull-up resistor to 3.3V and routed the phone contacts into GPIO 1 (ADC1):
      3.3V
       │
     [300Ω]
       │
       ├───> ESP32 GPIO 1 (Analog Read)
       │
  [Phone Contacts]
       │
      GND
The standard voltage divider formula calculates the voltage at the ADC pin:
With and :
- Handset UP ():
- Handset DOWN: The internal phone coils and switch circuitry pull the node to
In practice, the ADC numbers became rock-solid:
- Handset UP (Lifted): ~200 ADC counts (
0.16V) - Handset DOWN (On Cradle): ~645 ADC counts (
0.52V)
A quick hysteresis threshold in firmware (< 350 = OFF-HOOK, > 500 = ON-HOOK), and the cradle detection was instant and immune to switch bounce.
(Note: Don't use ADC2 pins like GPIO 15 if you're using Wi-Fi on the ESP32. The Wi-Fi RF driver disables ADC2 and turns your readings into erratic noise. Moving to ADC1 fixed it instantly.)
Breathing Sound into the Earpiece
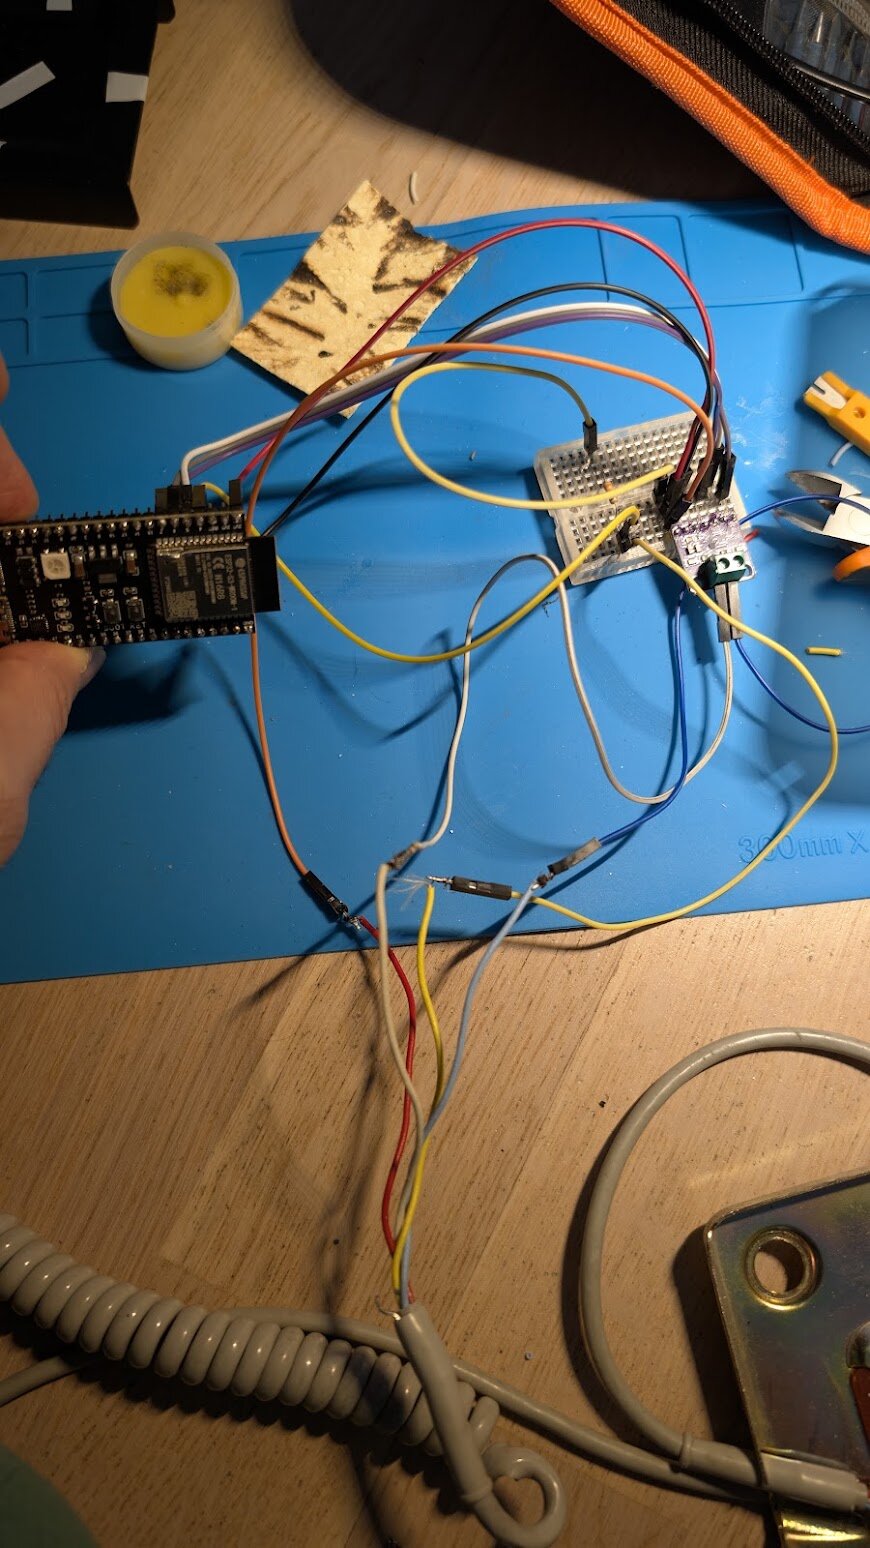
For audio playback, I wired a MAX98357A I2S DAC to the ESP32:
- BCLK: GPIO 5
- LRC: GPIO 6
- DIN: GPIO 7
The screw terminals of the DAC went straight into the vintage 200Ω magnetic telephone receiver in the earpiece. Because telephone lines originally operated at 8 kHz bandwidth, I configured the DAC to 8000 Hz 16-bit mono PCM.
Hearing neural speech downsampled to 8 kHz and filtered through an authentic 1970s telephone speaker diaphragm was wild—it literally sounds like a 70s switchboard operator calling your desk.
What About the Microphone?
You might wonder why I don't just speak into the handset microphone.
I couldn't get the original microphone working cleanly without adding a modern module—there was way too much static.
Vintage phones from this era use carbon granule transmitters. Instead of generating an analog voltage like modern electret or MEMS microphones, sound waves compress tiny carbon granules to modulate DC resistance. In original telephone exchanges, this relied on high loop voltages (24V–48V) and tens of milliamps of bias current.
An ESP32's 3.3V logic simply can't provide that loop power without dedicated analog pre-amplification. On top of that, 50 years of sitting in storage meant the carbon granules had compacted into clumps, creating an overwhelming wall of crackle.
I also wondered if the same MAX98357A board could double as an input for a microphone. As Gemini pointed out, the MAX98357A is strictly a digital-to-analog output amplifier with no ADC or audio-in pins. If I want voice input later, Gemini suggested tucking a dedicated I2S digital MEMS microphone (like an INMP441) inside the mouthpiece cup or swapping to an all-in-one audio codec (like an ES8388).
For now, rather than modifying the vintage handset, I opted for a hybrid CLI approach: you type your prompt on your computer, and the phone rings with the AI's spoken answer. It preserves the antique hardware while still delivering the tactile joy of an incoming call.
The Complete Flow
I wrote a small Python backend orchestrating the whole interaction over UDP:
- Ask a question via CLI:
python phone_assistant.py "Why were rotary dials invented?" - Instant AI Response: Generates a concise, spoken-style answer using Gemini 2.5 Flash (~2s latency) and converts it to 8 kHz PCM audio.
- The Phone Rings: Sends a
RING:STARTUDP packet to the ESP32. The buzzer on GPIO 16 starts firing with the classic European dual-pulse telephone cadence (ring-ring... ring-ring). - Pickup: You lift the handset off the cradle. The ESP32 catches the ADC voltage drop, immediately kills the buzzer, and signals the laptop.
- Listen & Cutoff: Speech streams into the earpiece over UDP. If you hang up the handset mid-sentence, the phone cuts off the audio stream instantly—just like hanging up on a real landline.
Why Build This?
Most AI interfaces today are text boxes or sterile cylindrical speakers that talk back to you in an empty room.
There is an odd delight in interacting with AI through an object that belongs in a museum. Reaching out, picking up a heavy Bakelite receiver, pressing it against your ear, and slamming it down when you're done brings back a physical satisfaction modern touchscreens completely killed.
Check out the code, firmware, and schematics on GitHub:
👉 GitHub: retro-ai-rotary-phone
Comments
Comments are powered by Giscus and require a GitHub account.